Friday Favorites # 4

Dittle Dattle made this awesome monogram wreath. Don't you just love it? Head over where she shows you how to make it.

Sweet Pea Kisses made this adorable snowman. I just love it.


These mugs are a great idea that Design Mom came up with using mugs from the thrift store. This would be a great teacher present.

These ruffle trees are so sophisticated looking. Shanty 2 Chic is so creative!

And, of course I had to share this awesome wallpaper from Leelou Blogs. Thanks so much for making this to share!

And last, but in no way least are these trees from Spunky Junky. She made these beautiful trees using tissue paper, cup and paper. Can you even believe that?


Go visit all these wonderful blogs where they share how to make these items and have a great weekend. Feel free to grab a featured button from the sidebar if your project was featured.


Pottery Barn Inspired Christmas Luminaries *free printables*

Remember back in October when I made my Pottery Barn inspired Halloween luminaries?  Those babies are $8 each! Not up my alley pricewise. So, the other day I was thinking that it would be fun to make some for Christmas and here's what I came up with.


All I did was find/make some clip art, print out my images, cut them to size and tape them onto some old jars I saved (from canning, peanuts, jelly etc...) Then put in tiny tea candles (or your could even use those little battery operated luminaries that are like 2 or 3 for a dollar at $ Tree). Now, enjoy your FREE luminaries. If you download the luminary printables, please, become a follower so you can be notified of future posts.


Friday Favorites #3

This week, as always there are so many amazingly talented ladies with awesome crafts on their blogs. Its so hard to choose just a few to share!

Kimba at A Soft Place to Land saw a picture of tablecloth she loved in a magazine and figured out how to make it. And, she shows us how to make one of our own. Isn't it great?


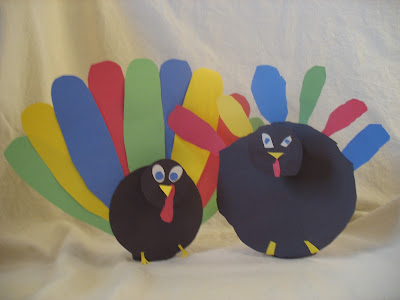
Over at Parents Magazine they show you how to make a turkey centerpiece. This is such a nice way to help us remember what we're thankful for.


Check out these map magnets. Wouldn't they be a perfect little stocking stuffer type item? Head over to Let Birdz Fly and Bailey shows you how she made them.

Childmade has these adorable hinged wooden snowmen.


And, Childmade also made this cute snowman family.


This little guy that Amy from Naptime Crafters made is so cute!

Look at these amazing woven stars made from old book pages. Amanda at House Revivals shows you how to make these gorgeous stars.
Happy weekend!

Kids Turkey Craft Using a Can or Bottle

I ran across this idea in a local paper and I thought it was pretty cute. My little guy had lots of fun making his turkey. We were joking that his is the turkey you want for thanksgiving dinner, and mine is the decorative turkey :)


This is a wonderful way for your kids to practice their cutting skills.

All you need to make these cute little turkeys are:
  • construction paper
  • toilet paper roll or paper towel roll cut into about 1-2 inch sections
  • glue ( I like a hot glue gun)
  • recycled tin can or water bottle
  • cereal box to make the bird more sturdy (optional)
To make your turkey, first cut out all the shapes for eyes, beak, waddle (or is that wattle? You know, the little red thing), legs and feathers. Next cut a big circle for the body and a little circle for the head.  We just traced a plate for the body and a cup for the head.
Wrap your can or water bottle in in paper, and glue in place.
Glue all the facial pieces to your turkeys face and glue feathers and legs to the body.
Then put glue on the top  edge of one of your toilet paper rolls and glue it to the back of the head. Now put glue on the bottom of the roll and glue that to the body.
At this point you may want to glue a piece of cereal box to the back of your turkey before attaching it to the can so that it is a little more sturdy.
And if you used a can you can think of something to be thankful for each day leading up to thanksgiving and fold it up and put it in your can.


Friday Favorites #2

I saw so many cute things this week. With Thanksgiving coming up this month, there are a lot of beautiful fall and Thanksgiving inspired ideas.

Cassie at  Hi, Sugarplum made some beautiful Ballard Designs inspired Burlap Vases.


Lizard n Ladybug made these cute little turkeys out of candy. This seems like a fun project for a family get together. Those who don't craft can eat the candy :)

We all made some 2x4 pumpkins it seems, but Kelli over at Lolly Jane came up with a fresh idea and created some 2x4 turkey art. It is really sweet and looks so easy to make.


Here is another great 2x4 turkey idea from Craft Goodies. Check out her tutorial on U-Create. You'll be surprised what this little guy is made out of!

I came across this awesome art display that Sarah from A Little of This, A Little of That made!

Aren't these give thanks bottles great? You could do so many things with this idea from Thrive.

I am loving these chalkboard place mats at Flamingo Toes. What a wonderful idea! I know all the little ones at our get-togethers would enjoy having one of these.


Happy weekend!

Make a Plastic Grocery Bag Holder

I am always getting more plastic bags from the grocery and I didn't really like any of the bag holders I've seen at the store. I wanted a cute way to keep them in check. This little bag holder is so easy to sew. All you need is a rectangle of fabric (or a cute dish towel would be perfect!), some elastic and a button(this is really optional. I wanted to be able to open and close the handle on my bag so I used a button.).  I figured there is no need to reinvent the wheel, so here is a link to a tutorial to sew a bag holder for yourself. If you have any questions please feel free to shoot me an email or post a comment.


Friday Features

I've seen so many cute things on other blogs and I wanted to share these great ideas with you. 
Carla over at the Southern Stamper made this really cute advent calendar.


Collete at My Computer is My Canvas made a cute gratitude printable tree. This would be a great way to help remember what we are thankful for, and to teach our kids. Head over there to get the free printables!


Becky from Infarrantly Creative made an awesome Ballard Designs Inspired paper  holder. I would love to make one of these!


Lindsay made a simply adorable turkey tee shirt applique. Head over to The Cottage Home to see her tutorial, complete with printable template.


And last, but definitely not least, check out these free desktop wallpapers. Aren't they great?

Leelou over at Leelou Blogs made this great wallpaper that is free to download.


And over at the Shabby Shoppe they made this adorable wallpaper for you to have.


Head over and visit these great projects and I hope you all enjoy these links and have a wonderful weekend!


Turkey Craft

This little turkey craft is so easy and so cute. Its a great kids thanksgiving craft for killing some time waiting for dinner. We made it last year at our family get together and there were kids from age 1 up to about 12 and they all had fun making these.

What you need:
feathers
googley eyes
pipe cleaners for the feet
red felt for the waddle
yellow felt for the beak
pom pom for the head
3 wine corks for the body
hot glue gun works best for gluing

First glue the 3 corks together vertically. Then, cut out the beak and waddle from the felt, shape the feet from pipe cleaners and then glue it all together using a hot glue gun. You could even put a little card on the front to use it as a name card for your place setting.
These are so easy to make and the kids love picking out all the parts to make the turkey craft- and, the kids at heart love it too :)


Pants Repurposed into Purse

I love to sew and I especially love to repurpose old things into something new. A few weeks ago I was over at Made it on Monday and I saw her really cute pants transformed into a purse and I couldn't resist making one for myself. It is really not that hard. I cut a pair of pants all the way up the inseam on both sides and then used the fabric for my purse parts, and I used the old pants waistline for my purse strap. You can use an old purse as your pattern outline, or just wing it and cut as you go.


Then, to line the purse I used a shirt that I don't wear anymore. I tried to get a picture of the lining, but it came out too grainy. I know you all know what the lining of a bag looks like anyway.

For the little fabric flowers, cut strips of old tee shirt and then cut a circle in your desired flower size and just twist the flower into shape and glue it to your circle with the glue gun. You should make one of these. Its so fun to see your pants and shirt get turned into a purse!

Bean Bag Tutorial

This year I'm homeroom mom for my son's kindergarten class. We are always looking for cheap party games, and we decided to do a bean bag toss as one of the halloween party games.  The bean bags are so simple to make. I wanted to share it, because my little boy is having lots of fun playing with the bean bags just around the house. And even if you just use them for a party it only cost 75 cents for the fabric and just a little while to make the bags.


What you need to make them:
1/4 yard of fabric
a bag of beans or rice (for filling the bean bags)
thread

First, cut your fabric. I cut mine across horizontally and then cut each of those strips into rectangles. Mine turned out to be 10 rectangles- each 4.5x5.5 inches.

Put 2 rectangles right sides facing each other and sew along 2 long sides and an end, leaving one end open so that you can put in the beans.


After you have the 3 sides sewn, turn the bag inside out (or should that be right sides out?) so you can see the right side of the fabric.


Next, fill the bag with 3 tablespoons of beans. This is great part to involve a little helper.


Time to clean up the beans you spilled all over the sewing machine trying to take a picture and fill the bag at the same time.
Once the bag is filled, tuck in the raw edges on top, folding them in towards the wrong side of the fabric.


Hold or pin the edges shut and sew along all 4 sides of the bag.


All done!


We're using buckets decorated with  jack-o-lantern faces to toss the bean bags into, but  you could use boxes or anything you can think of.

LinkWithin

Related Posts with Thumbnails