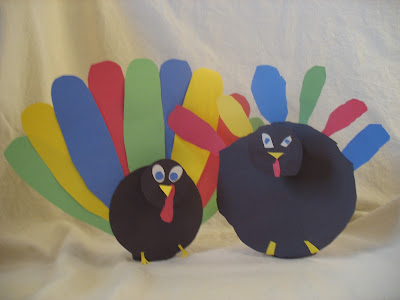
This is a wonderful way for your kids to practice their cutting skills.
All you need to make these cute little turkeys are:
- construction paper
- toilet paper roll or paper towel roll cut into about 1-2 inch sections
- glue ( I like a hot glue gun)
- recycled tin can or water bottle
- cereal box to make the bird more sturdy (optional)
To make your turkey, first cut out all the shapes for eyes, beak, waddle (or is that wattle? You know, the little red thing), legs and feathers. Next cut a big circle for the body and a little circle for the head. We just traced a plate for the body and a cup for the head.
Wrap your can or water bottle in in paper, and glue in place.
Glue all the facial pieces to your turkeys face and glue feathers and legs to the body.
Then put glue on the top edge of one of your toilet paper rolls and glue it to the back of the head. Now put glue on the bottom of the roll and glue that to the body.
At this point you may want to glue a piece of cereal box to the back of your turkey before attaching it to the can so that it is a little more sturdy.
And if you used a can you can think of something to be thankful for each day leading up to thanksgiving and fold it up and put it in your can.


4 comments:
What a great idea! My son looooves to cut paper so I'm sure he'll love to use his skills on this turkey craft!
Saw you at My Backyard Eden!
Super cute!
Thanks for linking up!
Cute! We just made a "thankful turkey craft" with our 3 year old daughter. Her hand prints were the turkey wings, so fun :)
Thanks for featuring my woven stars!
~Amanda
Post a Comment